Assistive Access helps you tailor apps for more focused choices and a lighter cognitive load. Here’s how a trusted supporter can customize it for a user with specific needs.
Overview
We’ll show you how to set up Assistive Access and how to start using it with the apps you choose to add.
- Before you start, as a trusted supporter, you’ll be guided through the initial setup process and will need to create a passcode specifically for Assistive Access.
- You’ll also need your Apple ID and password if you want to add it as a backup way to exit Assistive Access in case you forget the passcode.
- In Settings, scroll down and tap Accessibility.
- Then scroll all the way down and tap Assistive Access.
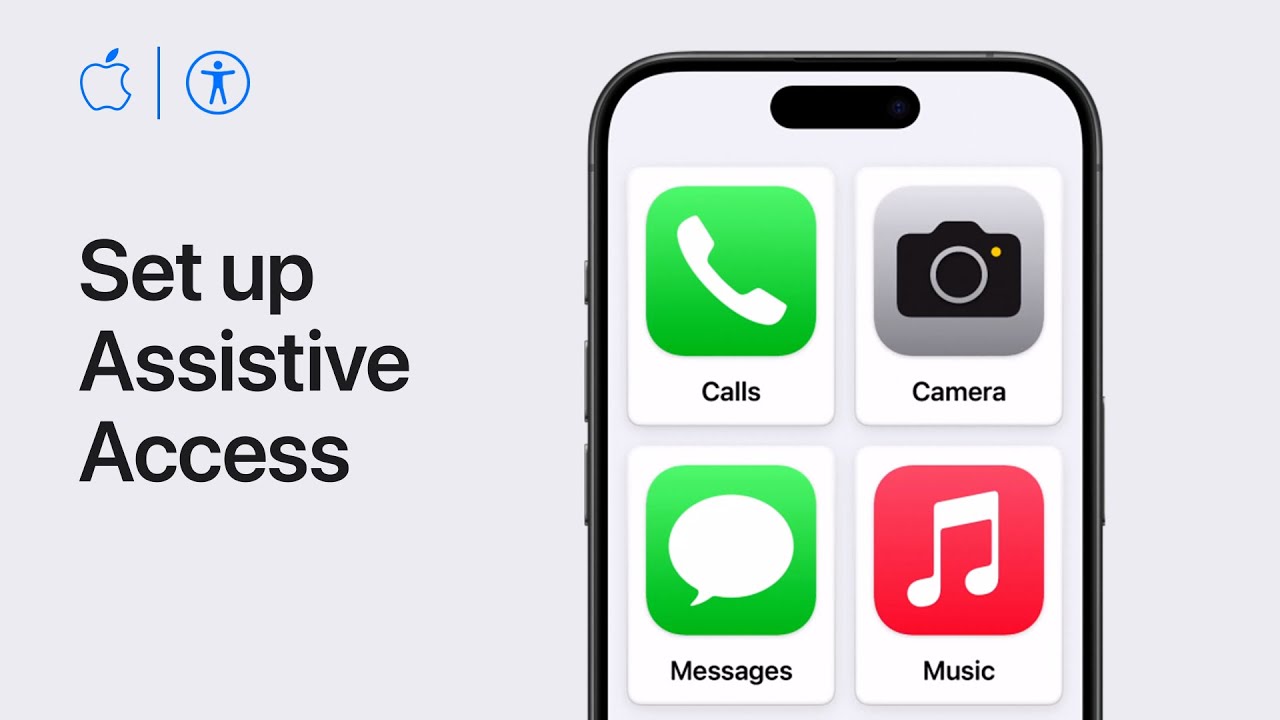
- Tap Set Up Assistive Access,and then tap Continue to get started.
- The user’s Apple ID should already be signed into the device you are setting up, but if it’s not, you can tap Change Apple ID to sign them in.
- Tap Continue when you’re ready.
- You’ll be asked to choose how text and app icons appear.
Rows or a Grid
Rows are great for users who prefer text, while the grid layout is great for users who prefer visuals. Let’s select Grid for our user.
- Tap Continue.
- Then tap the Add button next to an app to optimize it for Assistive Access.
The top section features apps that are designed with customizable options and are most useful to the user and close contacts they want to stay in touch with.
Merge Phone and FaceTime
- We’re going to add Calls, which gives the user a single app for phone and FaceTime calls with loved ones.
- You’ll be provided with a list of features to customize.
- For example, in Calls, you can decide whether the user can receive calls from anyoneor just from selected contacts.
- If you want to choose who the user can call, scroll down and tap Select Contact under Make Calls to Selected Contacts.
- Then, select a contact and select how the user can call them.
- You can choose a phone number for audio calls and FaceTime for video calls, and they’ll both appear in the Calls app.
- Next, tap to turn on the dialer keypad if the user would like to dial phone numbers.
- You can also turn on phone options like the keypad and speaker to show them on screen during calls.
- Tap Continue when you’re done.
Adding apps to Assistive Access
In addition to apps that have been specifically adapted for Assistive Access, you can add any other app that is installed on the device, which means they’ll have a consistent back button so the user can easily return to the Home Screen.
- When you’re done customizing Assistive Access, tap Continue and follow the promptsto finish the setup process.
- You’ll be asked to create a passcode that is specifically for Assistive Access.This should be different than the one usedto unlock the device.
Recovery
You’ll also be able to provide your Apple ID as a recovery option, just in case you forget the Assistive Access passcode. This does not have to be the same Apple ID as the user.
- Keep following the prompts and when you’re done, you can tap Start Using Assistive Access if you want to start using it right away.
- Or tap Enter Later to start using it at another time.
Additional Settings
Now that we have it set up, let’s check out some additional settings and then start Assistive Accessto show you how someone might use it.
- In Settings, scroll down and tap Accessibility.
- Then scroll all the way down and tap Assistive Access.
In these settings, you can scroll down for additional customization options to usewhile in Assistive Access, like changing the wallpaper and showing the time on the Lock Screen.
- When you’re ready, scroll to the topand tap Start Assistive Access.
- You can also add it as an accessibility shortcut.
- Next, enter the passcode you created during the setup process.
- The screen will go black while the deviceis entering Assistive Access.
- This might take a moment.
- Once it’s ready for the user, they can continue using their iPhone or iPad with a lighter cognitive load.